Showing posts with label 4th grade. Show all posts

Saturday, January 23, 2016

Andy Warhol Pop Art Prints

This project was based on Pop Art! Obviously, we studied Mr. Andy Warhol.
I love showing them his picture and see what their reaction is going to be. They usually respond with comments about his hair.  

We learned that "pop" stands for "popular".  He choose popular items because they were an equalizer.  Campbell's soup-taste the same no matter if you are rich or poor.
Coca-cola-you get the same product no matter who you are.

We looked at his prints and talked about color schemes.  
Students then choose a popular item or logo to create their prints.


  1. First, we drew our practice designs onto thin paper.  
  2. Then we traced through the thin paper onto the middle of a styrofoam plate.  
  3. We then cut the plate into a square.  
  4. Students choose four different colored rectangles to print onto.  
  5. After all the prints were finished, they glued them to a white background paper.  
Some students didn't quite understand about making sure the rectangles were all facing the same direction.  
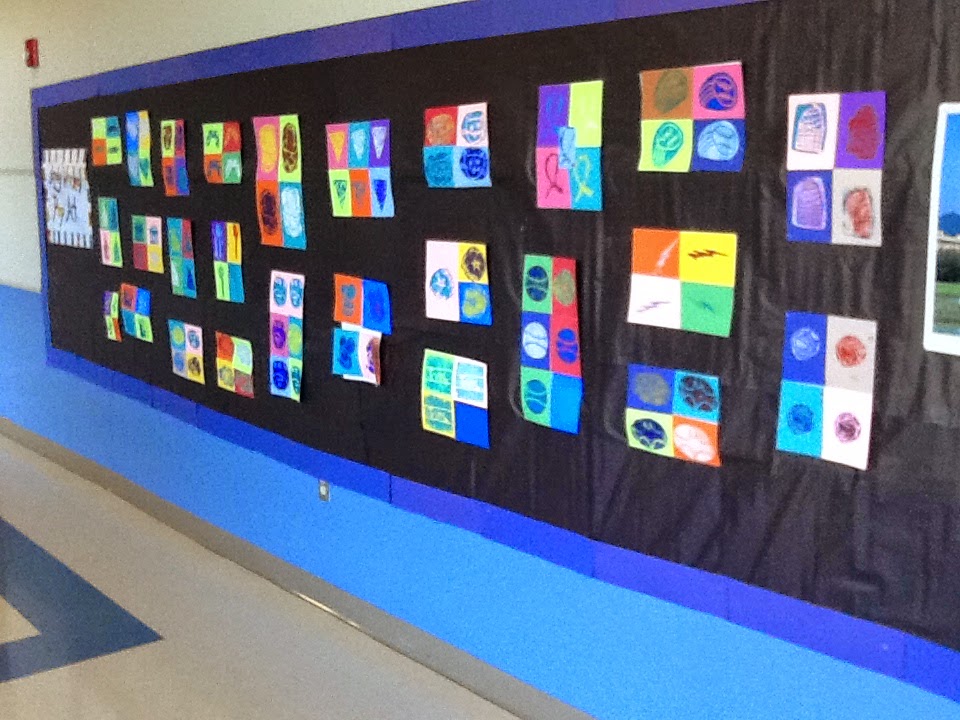


Cupcake

South Carolina 

Baseball

Lightning Bolt

Batman


Cancer Symbol

Baseball


Hello Kitty

Pizza

Michael Jackson

Video Game Controller

Bear


Cupcake

Birthday Cake

McDonald's Fries


Wednesday, December 31, 2014

4th Grade Aurora Borealis (Northern Lights)

This year I saw a new way of creating Northern Lights that I couldn't wait to try with my kiddos.  Here is the link to the blog where I found this amazing project Color and Collage Blog.  It has great instructions on it.

Everyone really loved the finished product, especially my young artists who made them.  


This is a project that works great with incorporating geography, science, and stories from tribes.

We discussed places that you can see the Northern Lights from and used GoogleEarth to check out where they are located (here are some main ones):
Canada
Alaska
Russia
Finland
Iceland 


Step One-Paint watercolor mountain paper
The first day we painted a sheet of watercolor paper with mostly blues, purple, pink, and black.  
Then was added some salt on top of the wet paint and then pushed plastic wrap on top of everything. I reminded the kids that they needed to work quickly so they paint would still be wet when they added salt and plastic wrap.


 Step Two: Cut and Glue down mountains
Draw and cut a stencil for the mountain paper.  The other blog has more details and a great example of this step.  I showed the kids how to cut and glue both of these paper down to look like a mountain range.  A great time to talk about foreground and background. 


Step Three: Create Chalk Lights

Now it's time to use your stencil to create the lights.  I made the kids put an "X" on the side of the stencil that matches their mountain range.  Then I showed them how to color the top of the stencil in chalk, drag it into the sky, and then smudge the chalk upward.  Some of them got very creative and used their stencil to create multiple lights.


 Step Four: Add Stars
The last thing we did was add starts with silver paint and toothpicks.  Everyone loves when the metallic paint comes out!